Intro
In this post we will show you how to use our python SDK to automate the UI of a Flutter web app.
Video
The essential of this discussion is also narrated and demoed in this YouTube video: https://youtu.be/rAJhGGkdnsY
Motivation
As you have probably realized by now, a typical Flutter web app does not have a standard DOM, which makes it tricky to automate with a standard webdriver. Our technology works visually without relying on the DOM for finding elements or interacting with them. Thanks to these properties, we can automate a Flutter app in a simple way.
Walkthrough
- We will first create a Flutter web app and look at its DOM
- We will use our python SDK in interactive mode to ingest an element, explaining as we go how the way the SDK works in tandem with the labeling UI
- We wil then run the script and verify correct behavior
- Finally we will discuss what is required to run headless in production and the gotchas of screen resolution.
Flutter web app
First let's create the default Flutter template app
flutter create flutter_web_app
cd flutter_web_app
flutter run -d chrome --web-port 61612
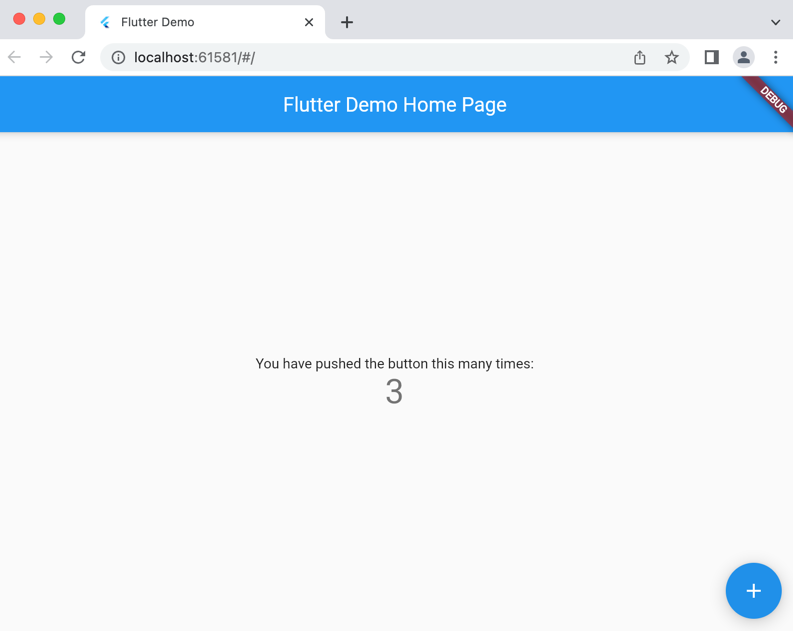
Chrome should open and you should see a UI counter with a push button to increase the counter like such

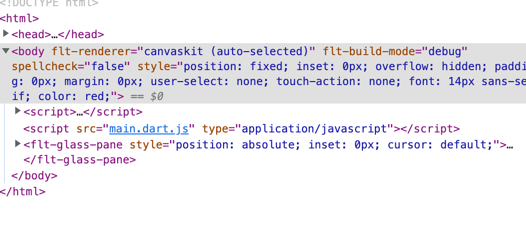
As we inspect the DOM we realize it's sparse, so there are no traditional locators to find the elements, no XPATH, id, etc

Using the SDK
Our python SDK provides a way to find elements called driver.find_by_ai('element_name'). This function works visually, it takes a screenshot of the web page, the user then labels the screenshot with a bounding box to indicate where is the element, after what the SDK is able to find the element when the script is run.
To get started we need to first create a test script.
It is important in our initialization to use the option use_cdp: True which enable Chrome Developer Protocol and allows deeper interaction that regular Selenium
Here is the script
from time import sleep

from selenium.webdriver import Chrome
from selenium.webdriver.common.by import By
from selenium.webdriver.chrome.service import Service
from webdriver_manager.chrome import ChromeDriverManager

from devtools_ai.selenium import SmartDriver

def _main() -> None:
    """Main driver"""
    chrome_driver = Chrome(service=Service(ChromeDriverManager().install()))

    # Convert chrome_driver to smartDriver
    driver = SmartDriver(chrome_driver, api_key="??API_KEY??", initialization_dict={'use_cdp': True})

    # Navigate to dev app
    driver.get("http://localhost:61581/#/")
    sleep(15)

    # Find the searchbox and send "hello world"
    print("Looking for element visually")
    btn = driver.find_by_ai("push_button_flutter_0")
    for i in range(12):
        btn.click()
        sleep(0.5)
    sleep(5)
    driver.quit()

if __name__ == "__main__":
    _main()
Let's quickly break down the script:
driver = SmartDriver(chrome_driver, api_key='<your api key from smartdriver.dev-tools.ai>', initialization_dict={'use_cdp': True})this line creates the wrapper around the Chromedriver to allow our SDK to automate the page. You need an API key, you can get started for 2 weeks for free on https://smartdriver.dev-tools.aidriver.get("http://localhost:61581/#/")this line navigates to the appsleep(15)my laptop is not super fast so it takes a while for the Flutter app to load, we have not implemented yet a way to wait for a Flutter app to load so we need to waitbtn = driver.find_by_ai("push_button_flutter_0")this line is the magic, it will take a screenshot of the page, open the labeling UI and ask you to label the element. You can see the labeling UI in the screenshot below
- You can see that in the web UI i have placed a bounding box around the button that we want to push, after that i click confirm crop.
btn.click()this line will click the button
Running the script
Now that we have the script, let's run it
export DEVTOOLSAI_INTERACTIVE=TRUE
python3 test.py
The script will run, and at some point it will prompt you and open up the SmartDriver web UI to ask you to label the element as shown in the screenshot. If it is not working on your machine, you can set export DEVTOOLSAI_INTERACTIVE=FALSE and it will display the link to open in the test logs, it has the same effect.
After labeling (clicking confirm crop), the script will resume running and click the button 12 times, then it will quit.
That's it, this is all there is is to automating a UI widget with dev-tools.ai.
Re-running the script: now that the element has been ingested, you can rerun the script like a regular test with
export DEVTOOLSAI_INTERACTIVE=FALSE
python3 test.py
This time it will not prompt you and run as intended.
Running headless in production
A word on screen resolutions
The visual matching algorithm is way more reliable when running always in the same resolution, that's why we recommend that you do your labeling by capturing the screenshots in the same resolution that you will use in your CI pipeline, you can achieve this with the following Chrome options:
from selenium.webdriver.chrome.options import Options

def main():
    chrome_options = Options()
    chrome_options.add_argument("--no-sandbox")
    chrome_options.add_argument("--disable-dev-shm-usage")
    chrome_options.add_argument("--headless")
    chrome_options.add_argument('window-size=2400x1600')
    chrome_driver = webdriver.Chrome(ChromeDriverManager().install(), options=chrome_options)
Running on Github Actions
We did another blog post explaining how to set up a GHA which install Chrome, Chromedriver and runs the test headless, you can refer to it here: https://docs.dev-tools.ai/blog/running-ui-tests-in-github-actions
Here is an example workflow for a smoke test in Flutter:
name: SDK client smoke test
on:
  push:
    paths:
      - sdk/**/*
jobs:
  Run-unit-tests:
    runs-on: [self-hosted, linux]
    steps:
      - name: Get branch name
        id: branch-name
        uses: tj-actions/branch-names@v5
      - run: echo "Running the tests and computing coverage"
      - name: Check out repository code
        uses: actions/checkout@v2
      - run: echo "The ${{ github.repository }} repository has been cloned to the runner."
      - run: echo "The workflow is now ready to test your code on the runner."
      - uses: nanasess/setup-chromedriver@v1.0.7
      - run: |
          export DISPLAY=:99
          sudo Xvfb -ac :99 -screen 0 1280x1024x24 > /dev/null 2>&1 &
      - uses: subosito/flutter-action@v2
        with:
          channel: 'stable'
      - name: Run python tests
        run: |
          cd ${{ github.workspace }}/sdk/python-sdk
          python3.9 -m pip install -r requirements-unit-tests.txt
          python3.9 tests/basic_crawl.py
      - name: Run python flutter tests
        run: |
          cd ${{ github.workspace }}/sdk/python-sdk
          python3.9 -m pip install -r requirements-unit-tests.txt
          cd tests/flutter_test_app/
          flutter run -d web-server --web-port 61612 &
          sleep 30
          cd ../../
          python3.9 tests/flutter_test.py
      - name: Run java tests
        run: |
          cd ${{ github.workspace }}/sdk/java-selenium-sdk
          gradle test --stacktrace
In your flutter_test.py make sure to sleep long enough to let the app load, you can use the following code to wait for the app to load:
    from time import sleep
    driver.get("http://localhost:61612/#/")
    sleep(42)

    # Find the push button and press it
    element = driver.find_by_ai('flutter_push_button')
Conclusion
The features exhibited here are currently available in our Python SDK, the first two weeks to verify that it does what you want are free after what you can see the pricing on https://dev-tools.ai.
Everything is self-serve but feel free to say hi on our Discord if you have issues or feature requests: https://discord.gg/2J9WEYdq5C
Thanks and happy testing!
